Last Change: 2025-08-27 #dba #JT
 sphe_add_boundary
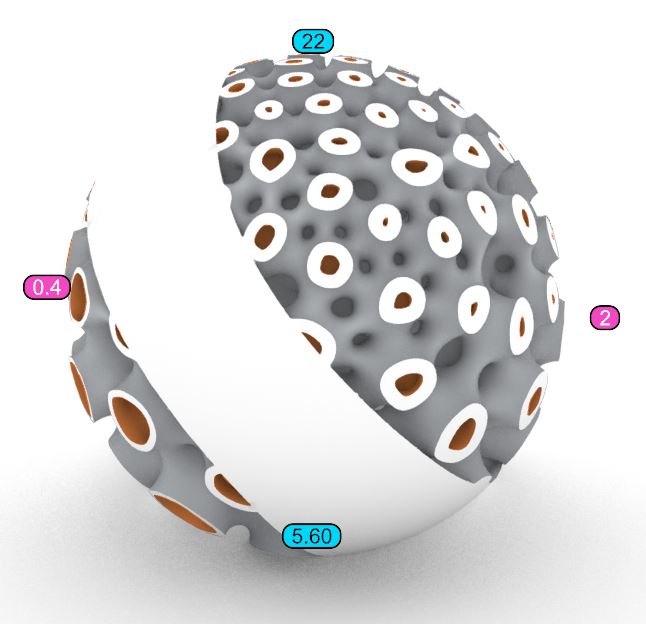
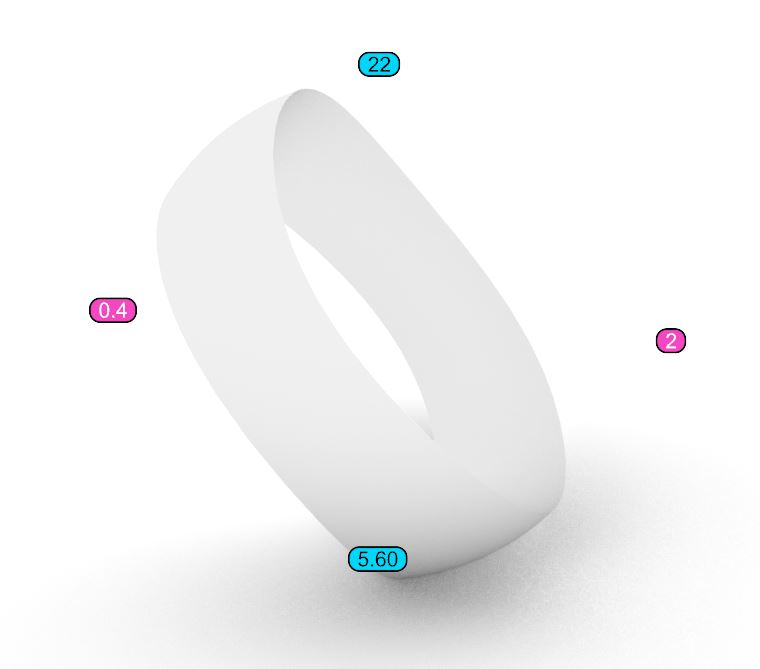
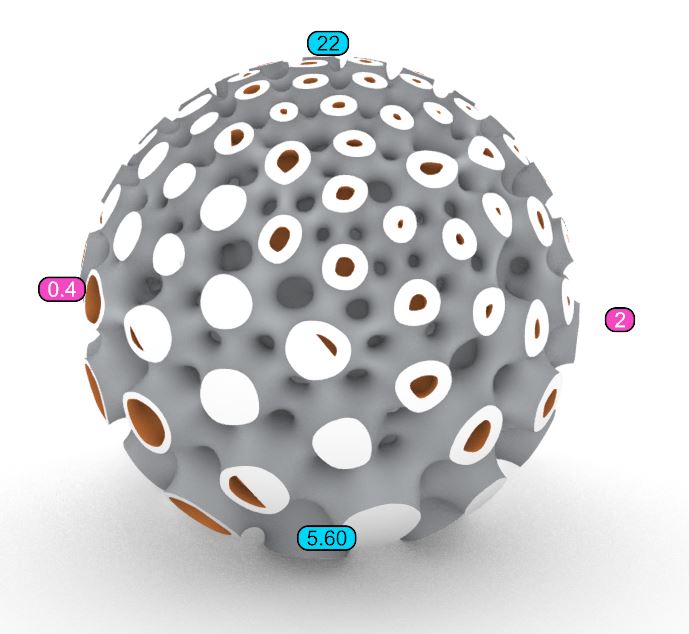
Using the sphe_add_boundary tool, you can modify the boundaries of the generated Spherene structure, as shown in the figure below.
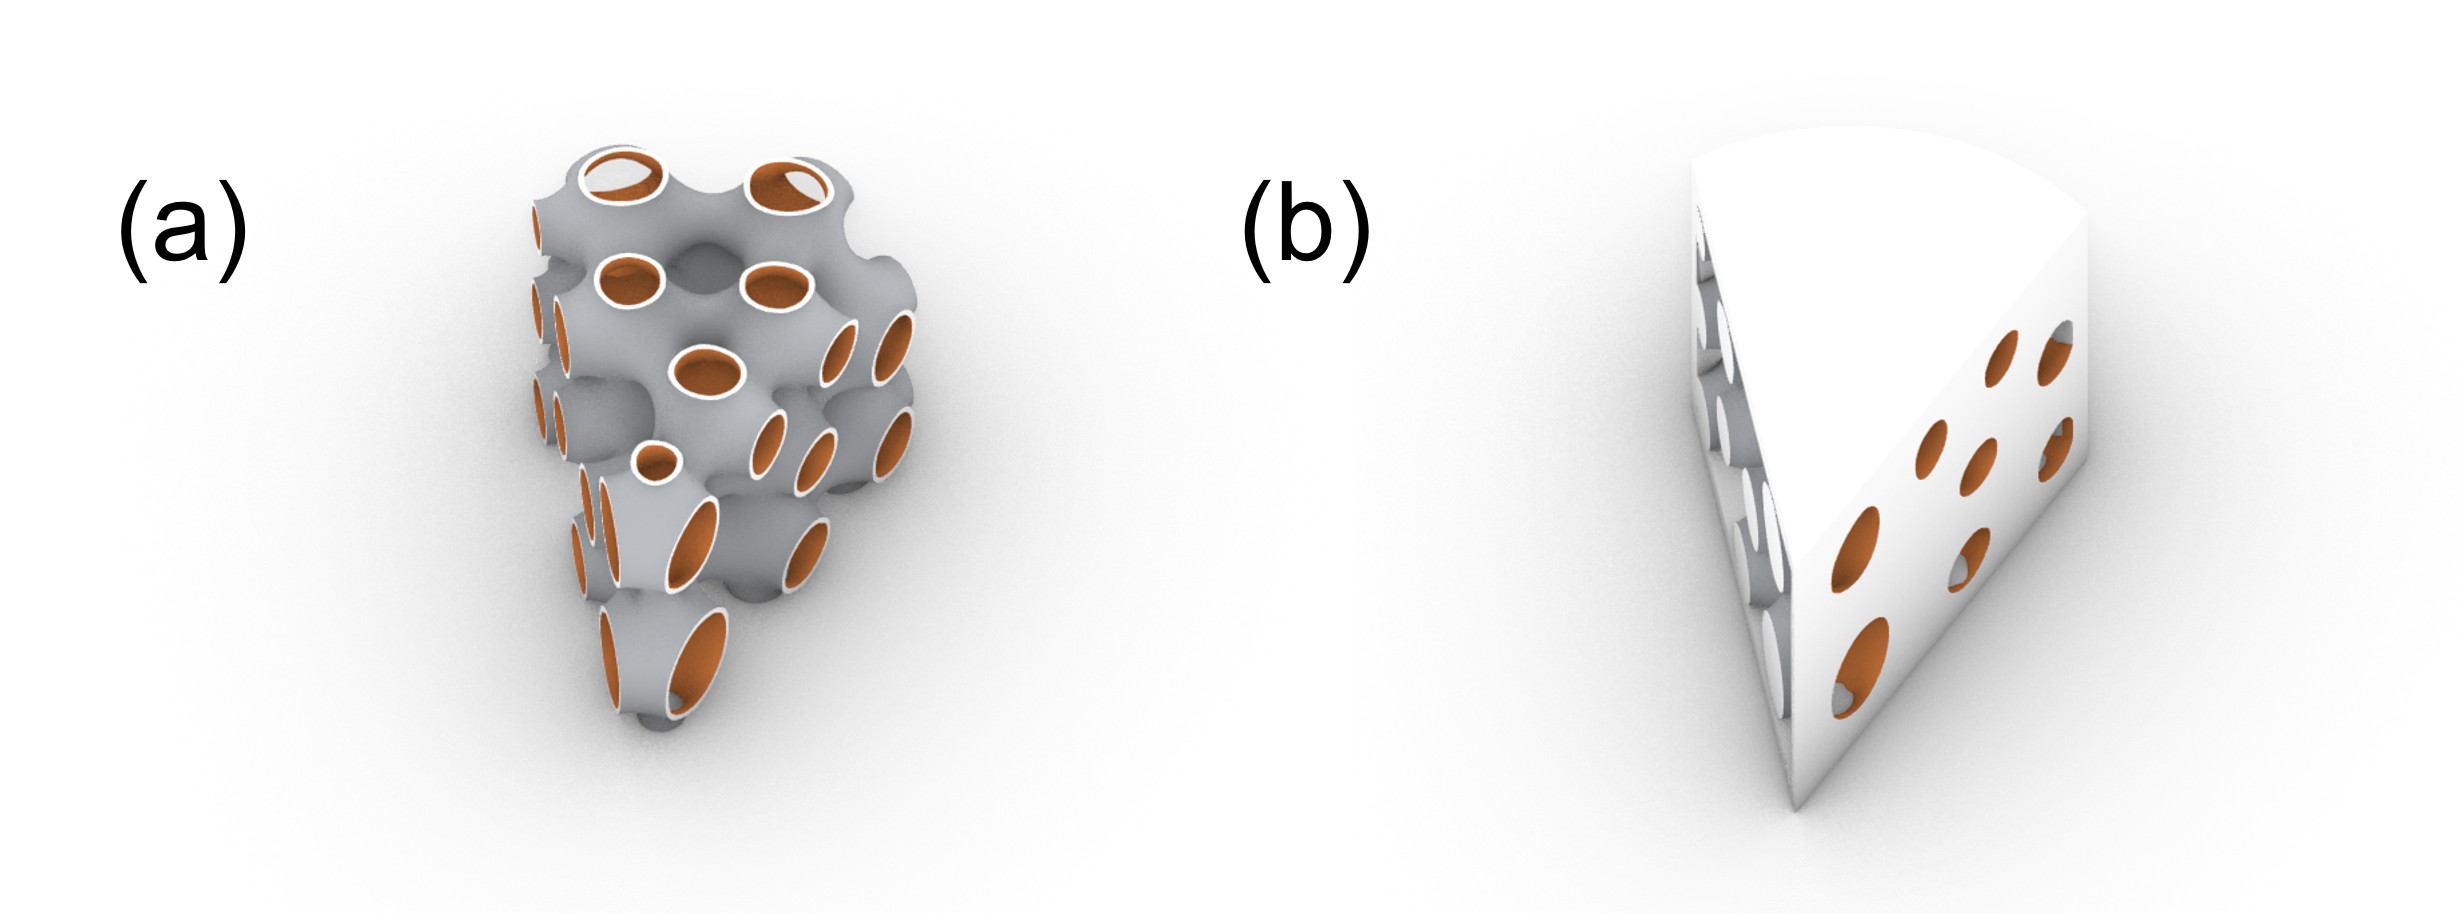
Spherene generated (a) without and (b) with the modified boundaries.
Usage
Use modifier mesh to define regions where to: (1) thicken spherene boundaries, close front, back or both (2) create and control smooth transitions at the boundaries (3) use open or closed mesh, fully or partially inside of Env
Adds a Boundary (sphe_boundary) to the meshes/boundaries layer of your project. It is a polygon surface or polygon solid that grows and thickens the spherene towards that surface or parts of the labyrinths, applying a wall thickness and a blend distance.
Select an existing boundary mesh and edit its value using the spherene inspector
Workflow
This video shows the workflow of how to use this tool (Made in older version, concept still applies to V2).
The general steps include:
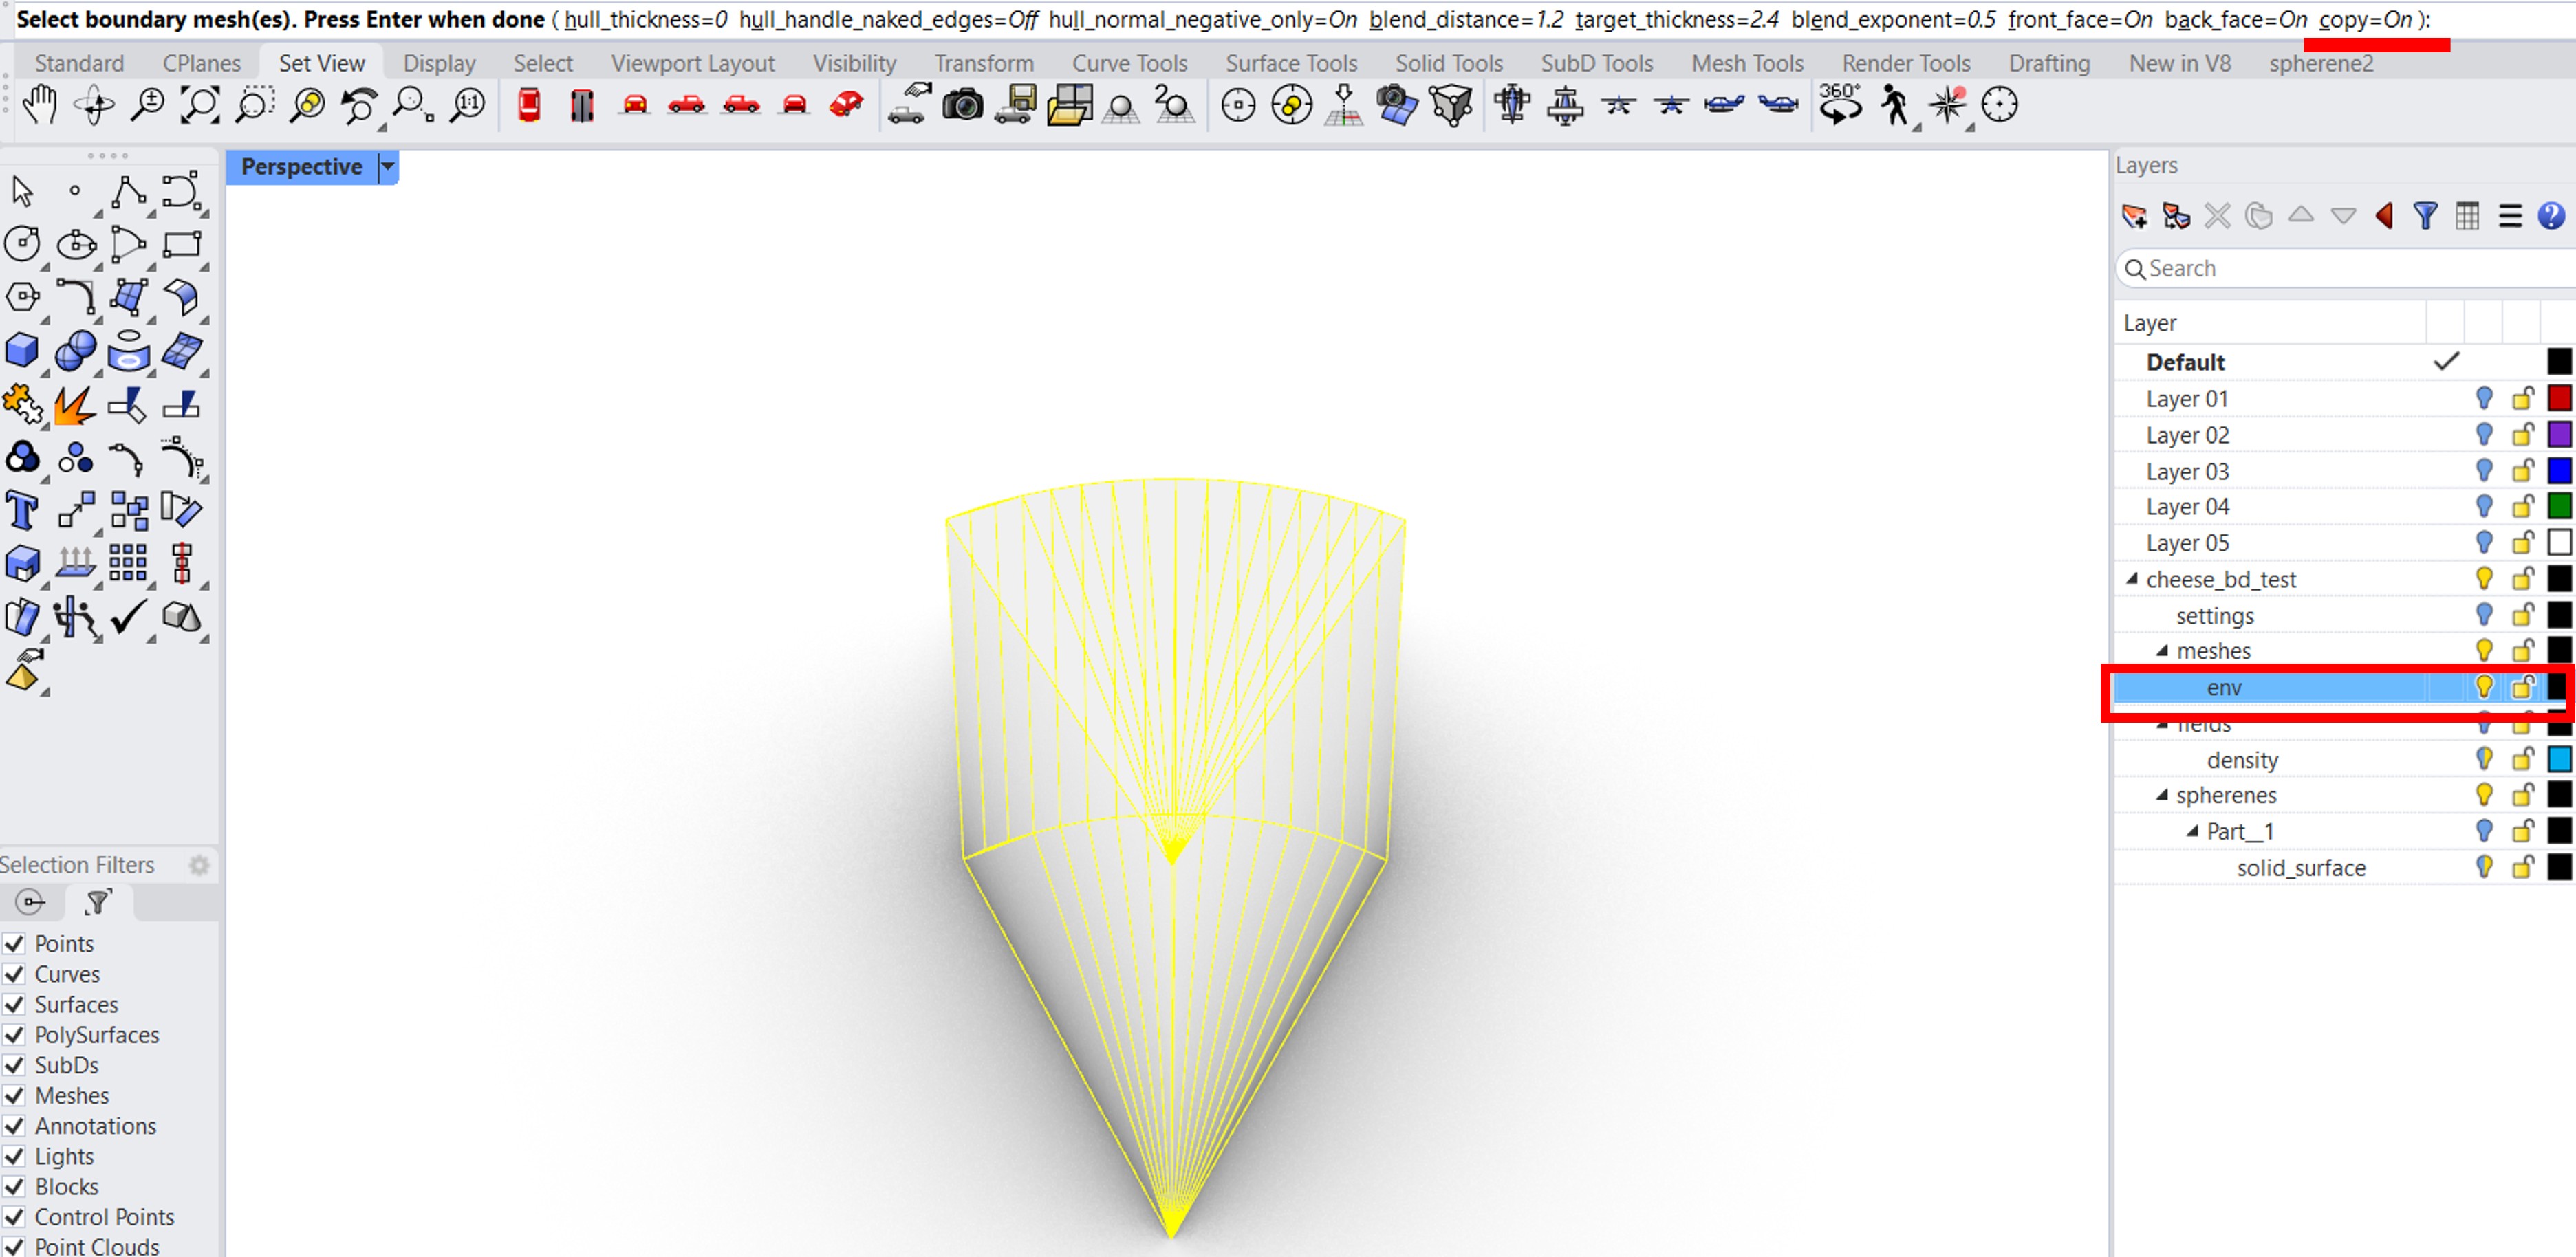
- Select the mesh envelope, then click the tool button .
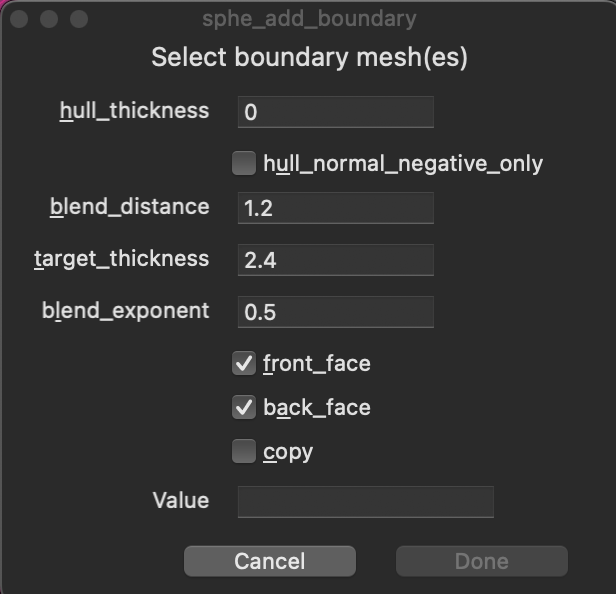
- In the pop-up window (for Mac users) or command line (for Windows users), set
copy=onand press Enter. This will create a copy of the boundary mesh.
- To apply different changes to individual boundaries, type
ExtractMeshPartin the command line, select the desired boundary surfaces, and press Enter to split the boundary mesh.
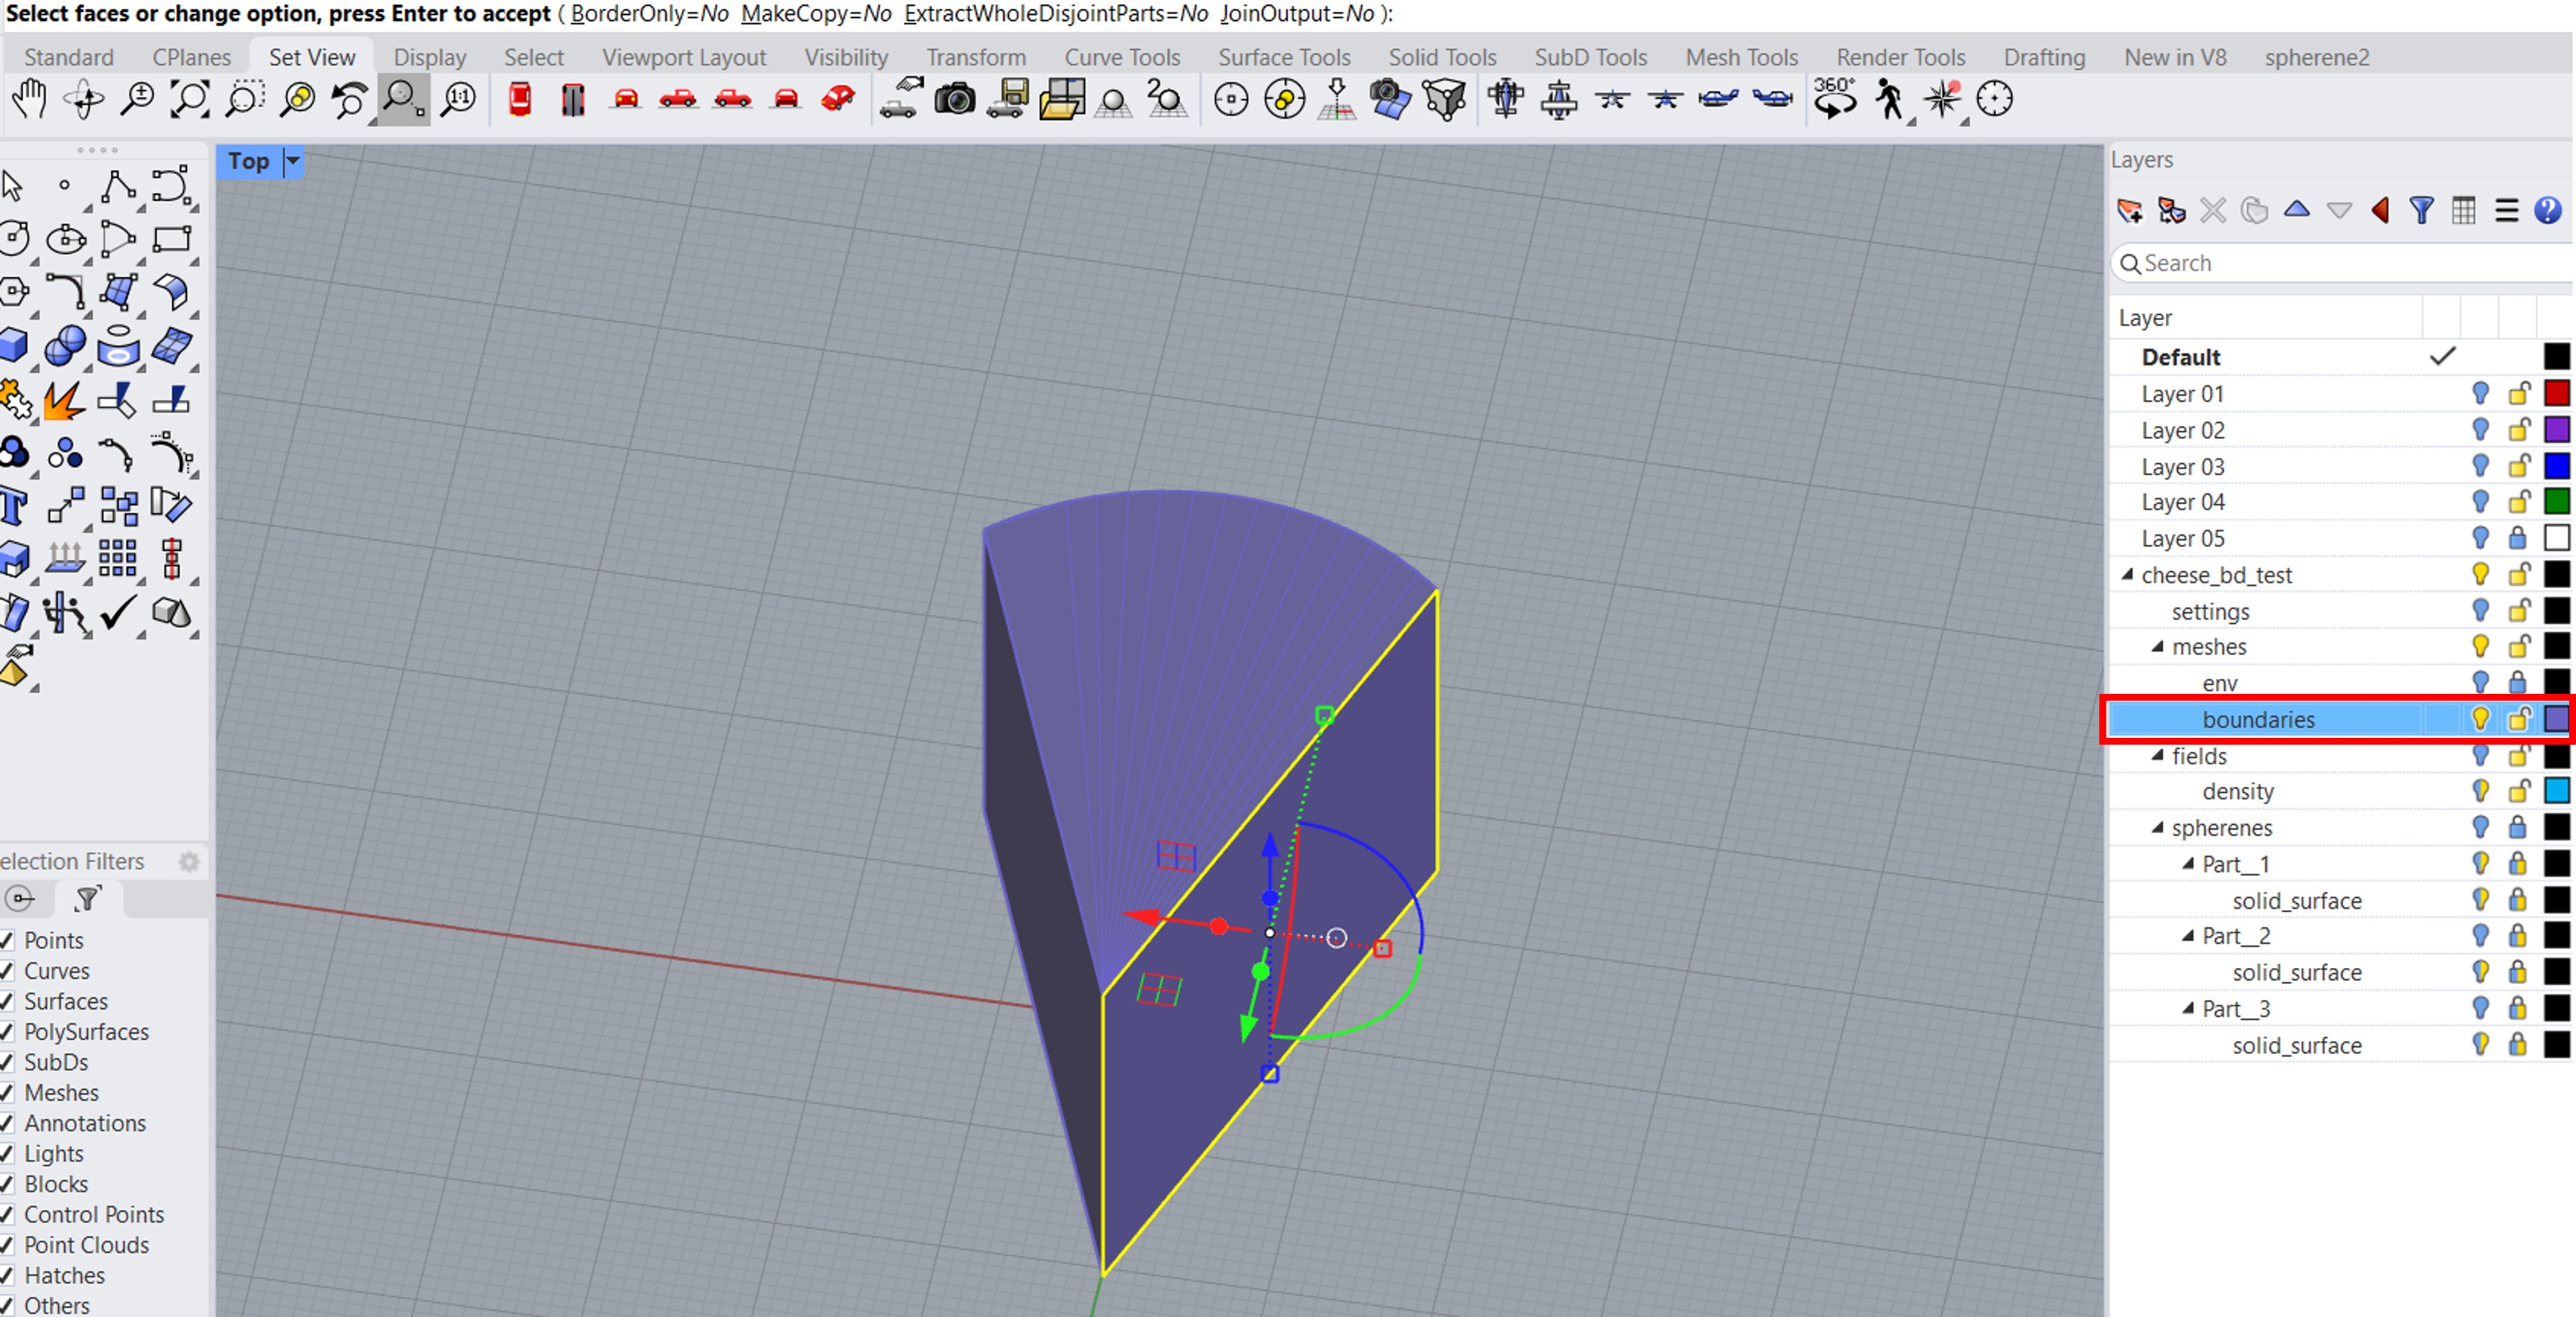
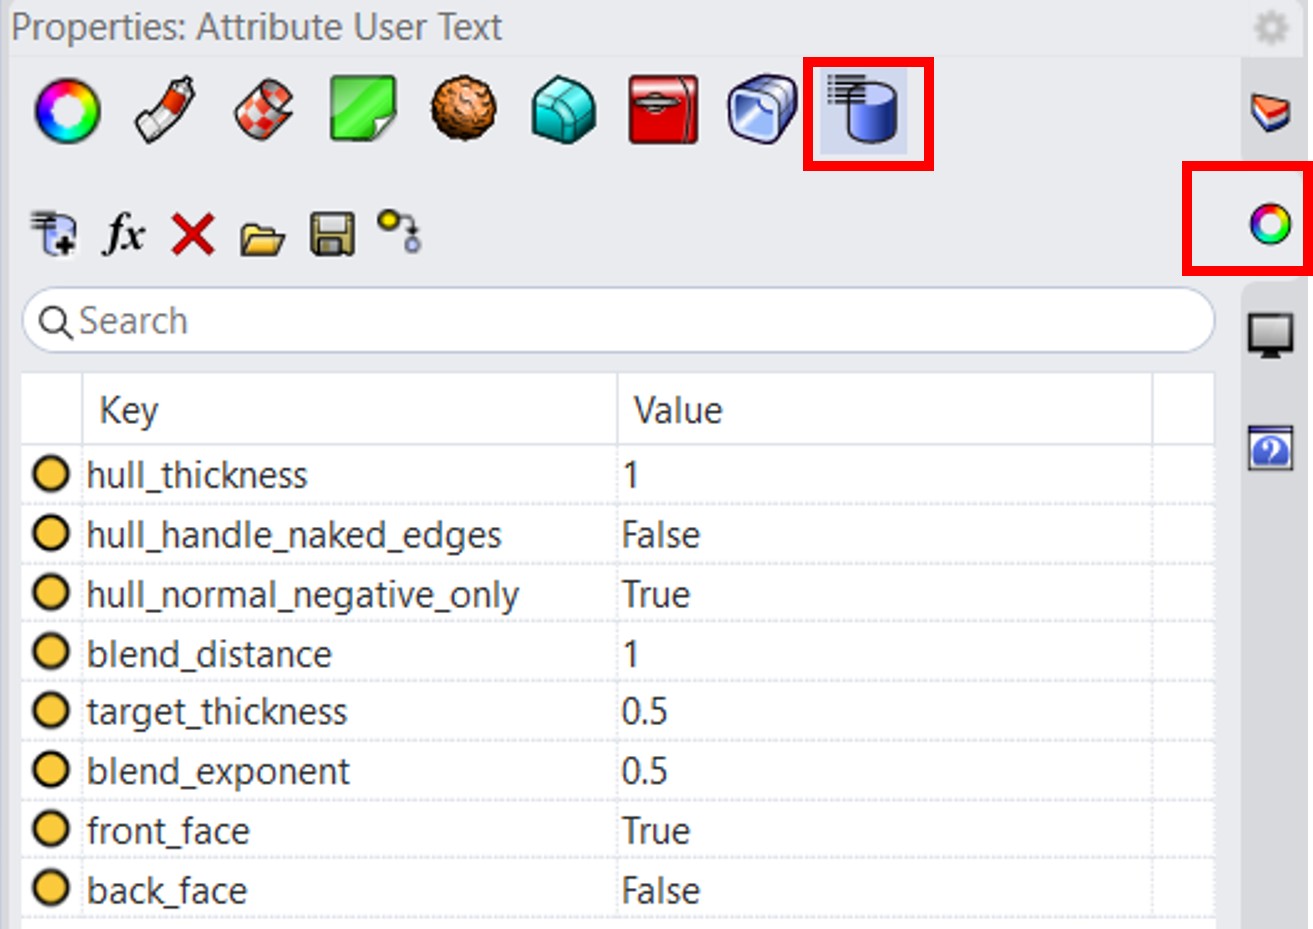
- Define settings for each boundary surface: select the desired surface, go to
Properties > Attribute User Text, and configure the related boundary parameters. Alternatively, you can easily modify these boundary parameters in theSpherene Inspectorafter selecting the desired boundary mesh and chooseboundariesin themodifiers.
- Click the compute button
 , select Solid Surface, and start the computation.
You can download this example file here.
Specifications
- Can be one or multiple meshes
- Is a triangulated surface or a triangulated solid
- Ideally follows env surface or is part of a trimmed env
- Can be positioned freely
- Grows and thickens spherene towards that surface or the front/back face of the labyrinths, applying a wall thickness and a blend distance.
Parameters
You can modify the following boundary settings in the spherene inspector :
-
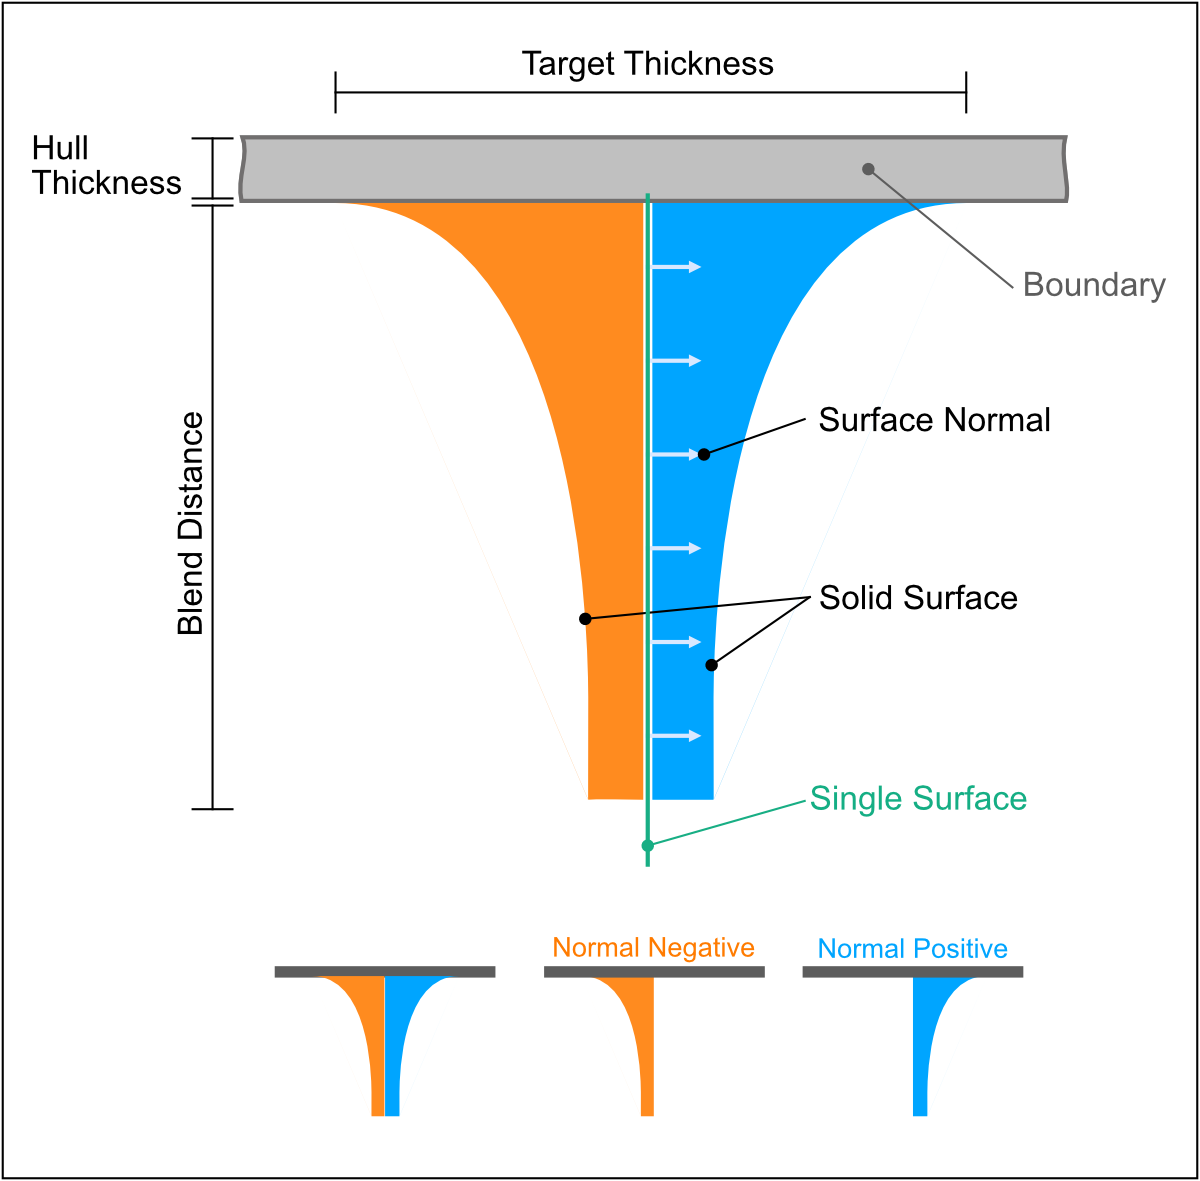
Hull Thickness: Defines the thickness of the boundary hull region. The unit matches the model’s length unit in Rhino. It should be a non-negative value. -
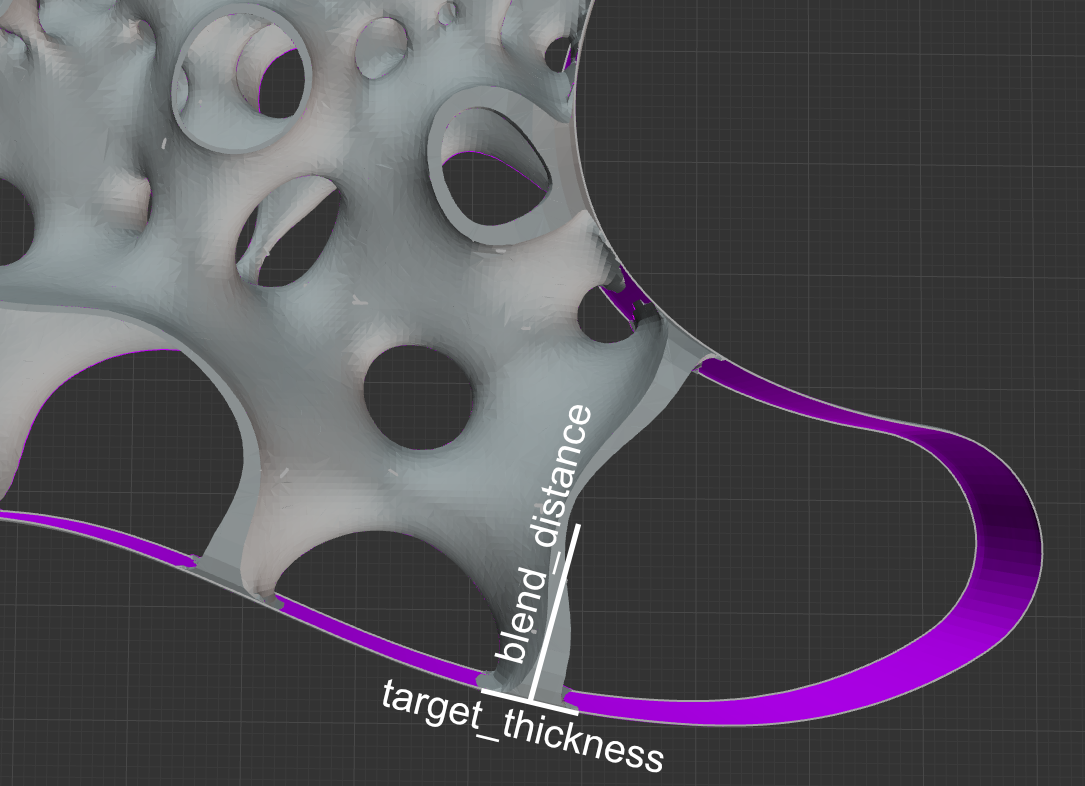
Target Thickness: Sets the wall thickness of the solid surface at the boundary location. Units match the model’s length unit. When a Boundary is applied to only one side, the resulting solid surface thickness at that boundary will be: . It should be a value larger than 0.1. -
Blend Distance: Controls the distance over which the Spherene structure blends smoothly into the boundary surface. Units match the model’s length unit. It should be a value larger than 0.1. -
Blend Exponent: Adjusts the curvature profile of the blend transition.
Common values:
0.125= very tight,
0.25= tight,
0.5= normal (default),
1= straight (45°). -
Front Face/Back Face: Boolean controlling whether to open or close the front/back labyrinths (see examples). -
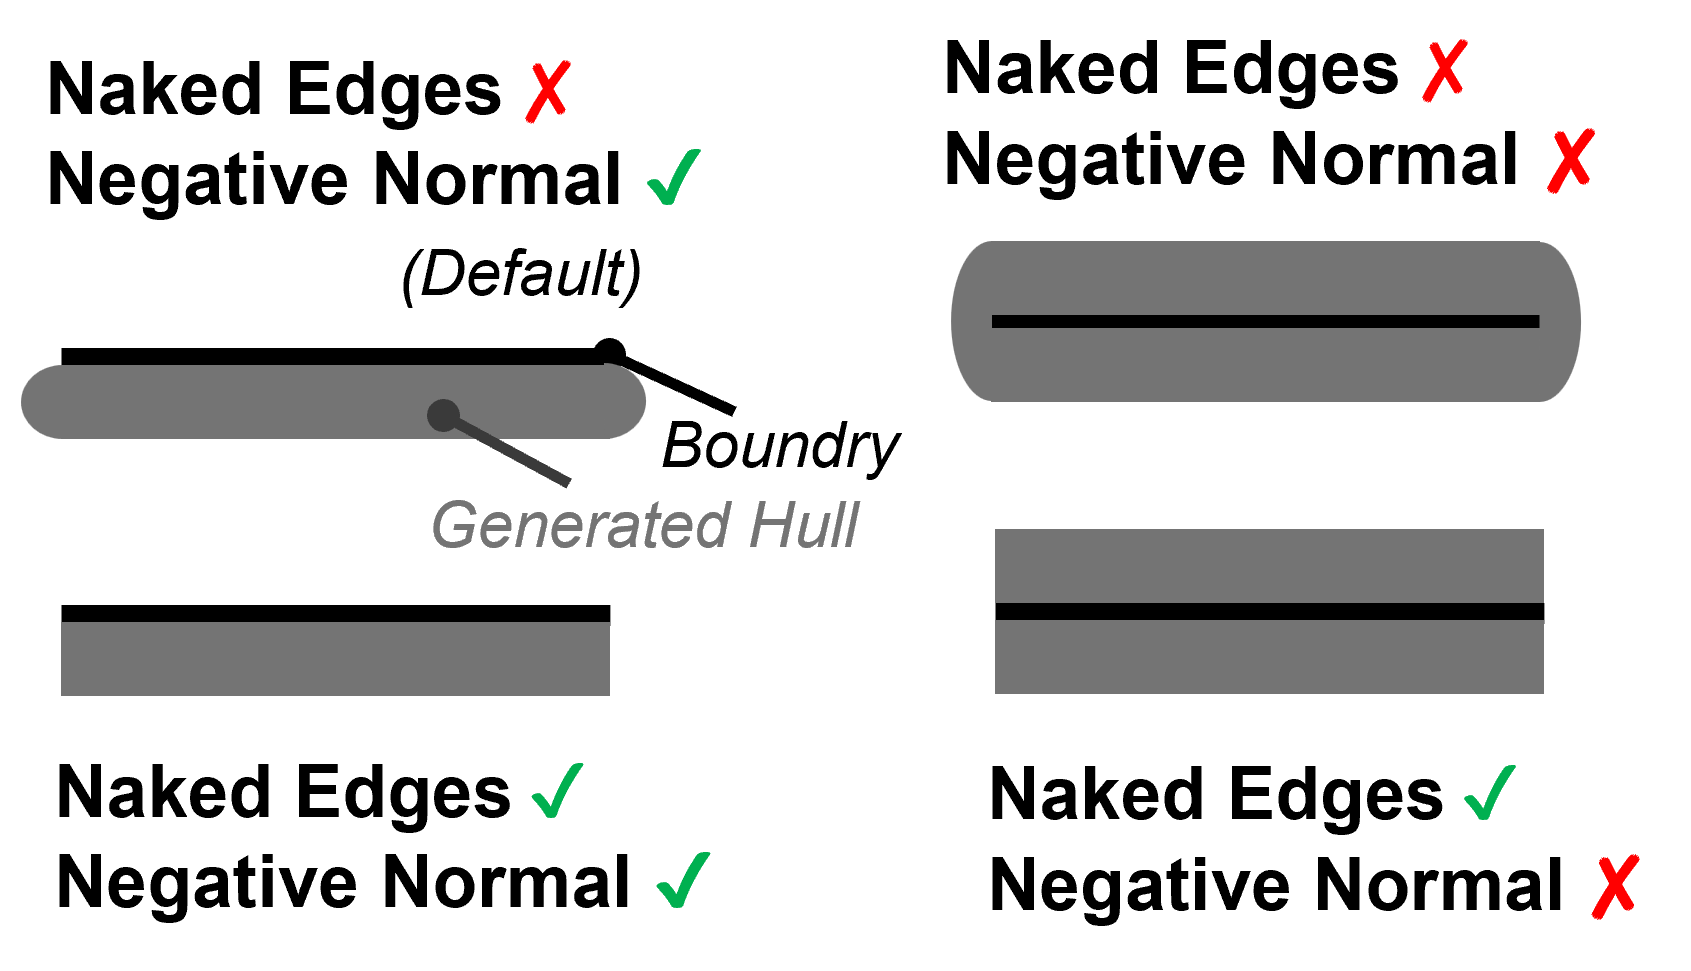
Hull Handle Naked Edges: Boolean toggle that controls hull generation when the boundary is an open mesh with naked edges andHull Thicknessis not zero. Default =False. When set toTrue, a hull with sharp edges will be generated along the naked edges of the open mesh boundary. Warning: In rare cases, enabling this option for complex boundary meshes may create unintended cavities. -
Hull Normal Negative Only: Boolean toggle that restricts blending to the negative normal direction of the selected boundary. Default =True. This option is especially useful when the boundary is located inside the computed envelope, allowing controlled blending between the boundary and the generated Spherene geometry.
In rare cases, Boolean errors may occur when the boundary lies close to the envelope surface. Set Hull Negative Normal = False to allow blending in both directions and produce a thicker hull; this often resolves the issue.
Examples
Boundary used to thicken spherene:
Boundary Mesh Input:
Front Face: False, Back Face: True
The volcano holes at the defined boundaries are sealed, while other areas at the boundaries remain open.
Front Face: True, Back Face: False
The volcano holes at the defined boundaries are open, while other areas at the boundaries are sealed.
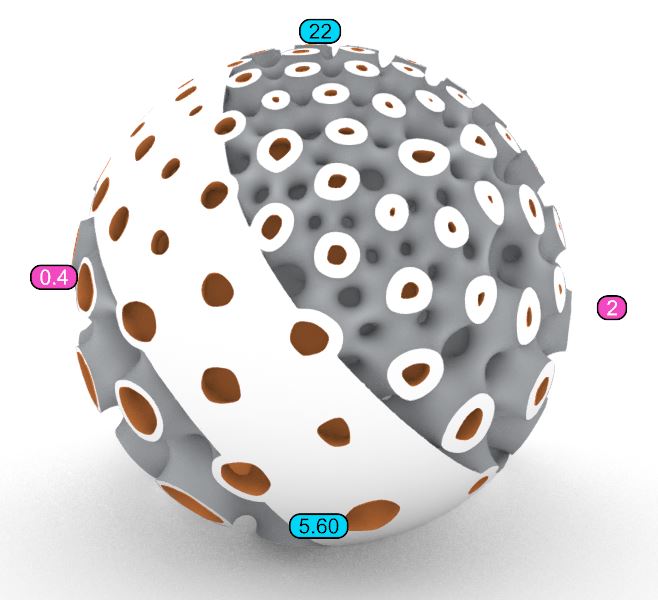
Front & Back Face: True
All areas at the defined boundaries are sealed.